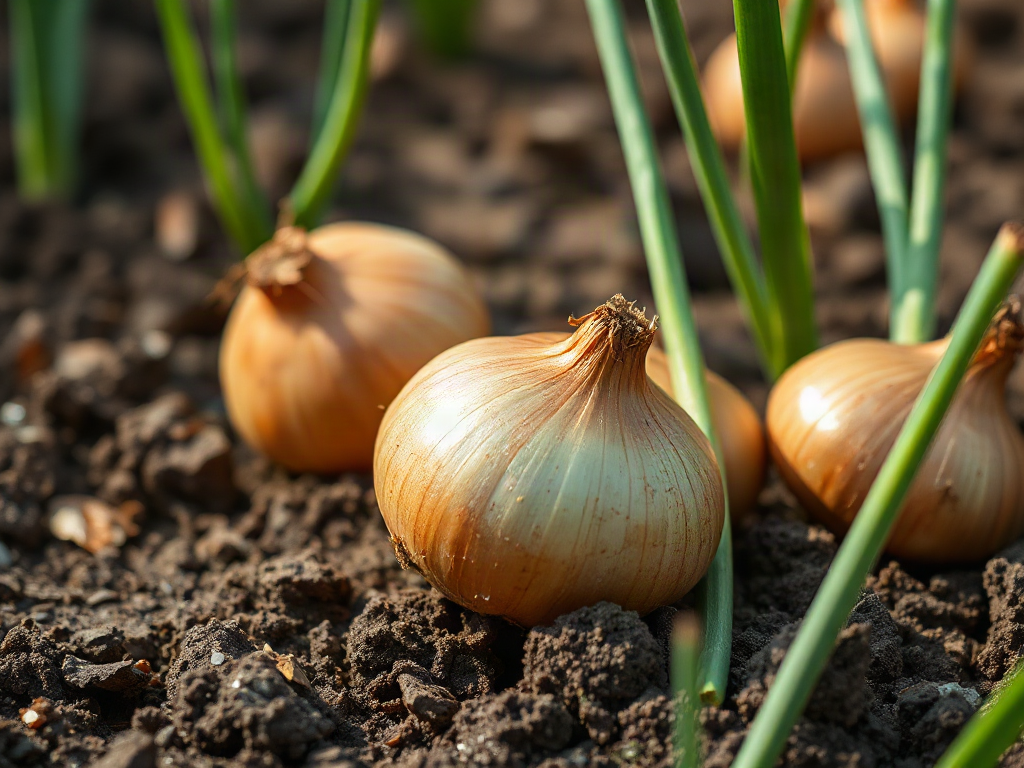
Onion growing basics from planting through harvest depend on selecting the right day-length variety, preparing loose fertile soil, maintaining steady moisture, and curing bulbs before storage. Plant sets, transplants, or seeds early enough for leaves to grow before bulb formation, and keep weeds from competing with shallow roots. Water deeply when the soil surface begins to dry, but reduce watering as bulbs mature so they can finish cleanly. Harvest when most tops bend and yellow, then cure onions in a dry, airy place until the necks are fully dry; bruising, excess nitrogen, and storing uncured bulbs are common causes of poor keeping quality.
Choose Onion Types and Planting Material
Successful onion production begins with matching the variety to your growing latitude and deciding whether seeds, transplants, or sets fit your schedule. Onions respond to day length: short-day varieties begin bulbing with relatively fewer daylight hours, intermediate-day types suit a broad middle range, and long-day varieties need longer summer days. A variety that bulbs too early may produce small onions in a northern garden, while one that needs longer days may form poorly in a southern garden.

Read the seed packet or transplant label for day-length guidance rather than relying only on color or bulb shape. Yellow, white, and red onions can all be useful, but storage life varies by variety. Strongly pungent storage onions often keep longer than very mild salad types, which are better suited to prompt use. The best choice also depends on the growing season: seed-grown onions offer the widest selection but take more time, whereas sets provide convenience and an early start.
Sets are small dormant bulbs and are usually the simplest option for a first crop. They establish quickly and tolerate rough handling, but oversized sets may bolt, especially after temperature fluctuations. Transplants give the plants a head start and can produce larger bulbs when the season is short. Seeds are economical and allow precise variety selection, although seedlings need consistent moisture and early weed control.
For a practical comparison, choose sets when simplicity matters, transplants when bulb size and a short season matter, and seeds when variety choice or lower cost matters most. Avoid buying anonymous mixed sets if uniform harvest timing is important. Planting material should be firm, disease-free, and appropriate for the region; weak or soft starts rarely become vigorous plants simply because they are placed in good soil.
For broader planning, the Onion growing basics from planting through harvest fit naturally beside crop rotation and seed-starting notes in a productive vegetable plot.
Prepare Soil and Plant at the Right Depth
Onions develop best in loose, well-drained soil that allows expanding bulbs to enlarge without resistance. A sunny bed with good air movement is preferable, and a soil test can reveal whether the pH and nutrient balance need adjustment. Mix mature compost into compact soil, but do not create a rich pocket of undecomposed material around each plant. Excessive nitrogen encourages lush leaves at the expense of mature bulbs and can reduce storage quality.
Work the bed deeply enough to remove hard clods and stones, then rake the surface level. Raised beds or broad rows are useful where heavy soil stays wet after rain. Onions have shallow roots, so a smooth, crumb-free planting surface improves contact for small transplants and seeds. Poor drainage is more damaging than slightly lean soil because saturated conditions restrict roots and increase the chance of rot.
Plant sets and transplants with the lower roots covered and the neck just at, or only slightly below, the soil surface. Deep planting can restrict bulb expansion and produce elongated shapes. Seed depth should follow the packet directions, but shallow placement is typical; tiny seed can fail to emerge if buried under a thick layer of soil. Space plants according to the expected bulb size. Close spacing produces smaller onions, while wider spacing allows larger bulbs but uses more bed area.
A useful small-bed arrangement is a grid rather than a single narrow row. This makes hand weeding easier and uses space efficiently, provided every plant has room for its mature diameter. Do not press soil tightly over the bulb area or pile mulch against the neck. Mulch between plants can conserve moisture and suppress weeds, but it should remain loose and away from the stem.
One common mistake is treating onions like deep-rooted plants. Their roots cannot compete well with established weeds, and a crusted surface can interrupt emergence. If planting into a new bed, connect the crop with onion planting depth and spacing decisions before placing the first row, since correcting crowded plants later risks root disturbance.
Manage Water, Weeds, and Bulb Development
Steady moisture supports leaf growth before bulbing and helps the plant build the foliage that supplies energy to the developing bulb. Water when the upper soil begins to dry, applying enough to moisten the root zone rather than sprinkling lightly every day. The exact frequency depends on soil, rainfall, wind, and temperature. Sandy beds may need attention more often than moisture-retentive loam, while heavy clay should be allowed to drain between watering.
Irregular moisture can lead to stalled growth, shallow roots, or split bulbs when a dry period is followed by heavy irrigation. Drip irrigation or a soaker hose keeps foliage drier than overhead watering and places water near the root zone. Water early enough in the day for leaves to dry if overhead irrigation is unavoidable. As bulbs approach maturity, gradually reduce irrigation, especially when the tops begin to lean and the weather is dry.
Weed control deserves priority because onion leaves are narrow and cast little shade. A fast-growing weed can take moisture and nutrients from an onion plant before the crop becomes visibly stressed. Hand-pull weeds while they are small, hoe only shallowly near the rows, and renew a light mulch layer when needed. Deep cultivation may cut onion roots and leave plants temporarily unable to use available water.
Fertilizer decisions should follow plant appearance and soil information rather than a fixed schedule. Pale, slow-growing leaves may indicate inadequate fertility, but yellowing can also result from waterlogged soil, pests, or disease. Heavy late nitrogen applications commonly produce large green tops with immature necks. That tradeoff matters: a slightly smaller, well-matured onion may store better than a larger bulb harvested with a thick, wet neck.
Check plants weekly for soft leaf bases, silvering or distorted foliage, and insect activity. Remove severely damaged plants rather than spreading a suspected problem through the bed. Avoid assuming every yellow leaf signals hunger. Healthy plants should add foliage steadily, remain upright through active growth, and show gradual top decline only as maturity approaches.
Recognize Maturity, Harvest, and Cure the Bulbs
Onions are ready for harvest when the bulbs have reached useful size and a large proportion of the tops have naturally bent over and begun to yellow. The neck should feel less rigid than it did during active growth. These signs are more reliable than a calendar date because weather, variety, planting method, and day length all affect development.
For immediate kitchen use, individual onions can be pulled whenever they are large enough. For storage, wait until the crop has clearly entered maturity, but do not leave bulbs in wet soil once the tops have collapsed. Rain late in the season can encourage rot and renewed root growth. If a severe storm flattens the foliage early, allow the bulbs to dry as conditions permit and use damaged or immature onions first.

Loosen the soil with a fork when necessary and lift bulbs without striking or throwing them. Bruises may not be obvious at harvest, yet damaged tissue becomes an entry point for decay during storage. Leave the tops attached while curing. Spread onions in a single layer in a dry, shaded, well-ventilated location such as a covered porch, shed, or airy barn. Avoid sealed containers and damp floors.
Curing dries the outer skins and closes the neck, creating a better barrier against moisture loss and microbes. Turn bulbs occasionally so air reaches all sides, but handle them gently. The crop is ready for storage when the outer skin is papery and the neck is dry rather than fleshy. Cut tops after curing, leaving a short neck, or braid varieties with suitable flexible foliage.
A frequent failure is harvesting by pulling the tops down or bending them manually before the bulbs are mature. Forced lodging can damage the neck without accelerating proper ripening. The better approach is to judge natural decline, protect bulbs from rain, and give curing enough time. For a related harvest reference, see onion harvest and curing practices.
Store Onions and Correct Common Problems
Store cured onions in a cool, dry, dark, ventilated place, separated from produce that requires high humidity. Mesh bags, slatted crates, or shallow baskets allow air movement; deep piles trap heat and moisture around lower bulbs. Inspect the crop regularly and remove soft, leaking, sprouting, or moldy onions before decay spreads.
Storage life is influenced by variety, maturity, curing, and handling. Mild fresh onions may keep for a shorter period than firm storage varieties, even when both were grown under identical conditions. Do not refrigerate a large quantity in a humid crisper unless the onions are intended for near-term use. A dry pantry with air circulation is generally more suitable for cured bulbs.
Small bulbs are not necessarily a failure. Crowding, low fertility, early weed competition, late planting, or a day-length mismatch can all limit size. If plants made abundant leaves but formed poor bulbs, review variety selection and nitrogen use before adding more fertilizer. If bulbs split, examine irrigation consistency and late-season watering. Soft bases or foul odors point more toward excess moisture, injury, or disease than a simple nutrient shortage.
Bolting is another common disappointment. Cold exposure, oversized sets, stress, and variety choice can contribute. Pull flowering onions promptly and use them fresh because the central stalk makes the bulb less suitable for long storage. Next season, use appropriately sized sets or transplants and select varieties suited to the local climate.
A compact priority check before planting is useful:
- Confirm the variety’s day-length requirement.
- Prepare drainage and loosen the root zone.
- Plant shallowly with spacing matched to desired bulb size.
- Keep weeds small and moisture reasonably even.
- Harvest gently, cure thoroughly, and store only sound bulbs.
That sequence prevents more problems than adding extra products to the bed. Onion growing is relatively straightforward when variety, planting date, moisture, and maturity are treated as connected decisions rather than separate tasks.
Frequently Asked Questions
When should onions be planted?
Plant onions early enough for strong leaf growth before bulbing begins. The best date varies with climate, variety, and whether you use seeds, transplants, or sets.
How deep should onion sets be planted?
Cover the roots and place the neck at or just slightly below the soil surface. Deep planting can restrict bulb expansion and produce elongated onions.
How often do onions need water?
Water when the upper soil begins to dry, soaking the root zone deeply. Adjust for soil and weather, and reduce watering as bulbs mature.
Can onions be harvested before the tops fall over?
Yes, onions can be pulled young for fresh use. Storage onions should generally remain in the ground until tops naturally decline and the neck begins to dry.
How long should onions cure?
Cure onions until the skins are papery and the necks are fully dry. The time depends on humidity, airflow, bulb size, and weather, so judge the condition rather than a fixed number of days.
Conclusion
A dependable onion crop comes from several modest decisions made in the correct order. Match the variety to local day length, prepare soil that drains and does not resist bulb growth, and plant sets, transplants, or seeds shallowly with enough room to mature. Protect the crop from weeds and moisture swings while leaves are building energy, then taper irrigation as the tops naturally decline. Harvest without bruising, cure every bulb until its neck is dry, and store only sound onions in a cool, dry, airy place. If the crop disappoints, inspect variety choice, planting date, spacing, nitrogen, and watering before blaming the soil. Those observations provide the clearest adjustment for the next planting.