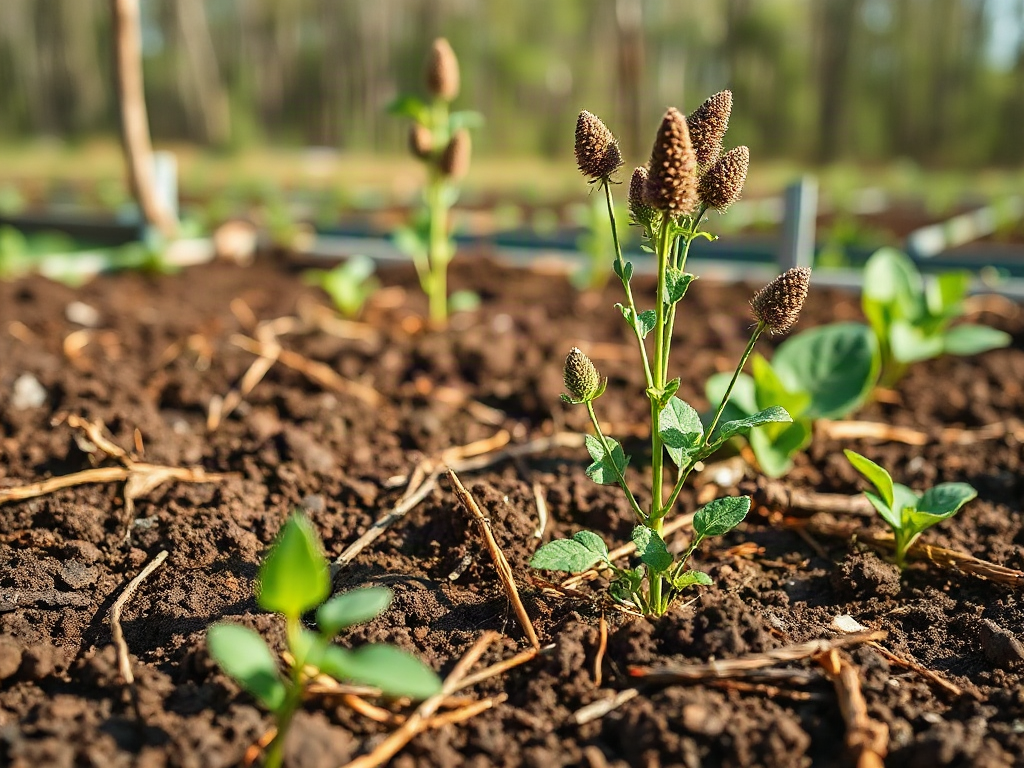
No-till gardening methods for a new homestead work best when you suppress existing vegetation, build planting areas with compost and organic mulch, and disturb the soil only where seeds or transplants go. Sheet mulching with overlapping cardboard can block grass, while a deep layer of finished compost supplies a workable seedbed without turning the ground over. Keep the surface covered, use broad paths to prevent compaction, and expect weeds or nitrogen tie-up if mulch is thin or carbon-rich materials are mixed into planting soil. Test drainage and soil pH before committing to large beds, because no-till methods cannot correct standing water or severe contamination.
Assessing a New Site Before Covering the Soil
A successful no-till garden begins with site assessment, not mulch. Walk the proposed area after rain and look for standing water, runoff, exposed roots, buried construction debris, and dense perennial weeds. Observe sunlight across the day as well; most fruiting vegetables need a bright location, while leafy crops tolerate somewhat less direct light. A bed placed beside a barn may appear convenient but could receive roof runoff or shade that changes its performance.

Soil disturbance is reduced in a no-till system, so the initial location matters more than it does in a repeatedly cultivated plot. A basic soil test can identify pH, phosphorus, potassium, and organic matter concerns, but it will not replace a physical inspection. Take separate samples if one section is sandy and another is heavy clay. If the site has a history of industrial use, treated lumber, dumping, or unknown fill, seek appropriate local testing before growing food there. Raised beds with imported soil may be a more sensible boundary than trying to remediate questionable ground.
Existing vegetation also determines the first move. Annual weeds under cardboard are usually easier to suppress than rhizomatous grasses, bindweed, or other persistent perennials. Mow or cut tall growth close to the ground, remove seed heads if practical, and plan extra monitoring around the edges. Do not assume a thick mulch layer permanently kills aggressive roots. Some plants will exploit seams, bed borders, and paths, especially when moisture is reliable.
Mark beds that are narrow enough to reach from both sides without stepping on them. A width of roughly three to four feet suits many gardeners, although arm reach and accessibility should determine the final measurement. Keep permanent paths clearly defined with wood chips, straw, or another suitable surface. The common mistake is treating the entire garden as a planting area; concentrated foot traffic then compresses the same soil that the no-till method is meant to protect.
Before building, prioritize drainage, sunlight, access to water, and a manageable first-year footprint. A small garden that can be covered and checked consistently is more useful than a large one overtaken by weeds. The planning principles described in No-till gardening methods for a new homestead should be applied to the actual conditions of the property rather than copied as fixed dimensions.
Building No-Till Beds With Sheet Mulch and Compost
Sheet mulching creates a temporary barrier over existing vegetation while organic material accumulates above the ground. Begin with overlapping plain brown cardboard or several layers of uncoated paper, wetting it as you work so it conforms to the soil. Overlap seams generously rather than leaving narrow gaps where grass can emerge. Remove plastic tape and glossy, heavily printed, or waxed material when preparing cardboard for a food garden.
Place finished compost above the barrier when planting immediately. A layer several inches deep provides a loose medium for seeds and transplants while the material underneath decomposes. For a future bed that can wait, use compost, aged leaves, or well-rotted manure and allow the area to settle. Fresh manure is not equivalent to finished compost: it may contain viable weed seeds, smell strongly, injure roots, or create food-safety concerns depending on the material and its handling.
Different materials serve different purposes. Compost supplies relatively available nutrients and fine texture. Leaves and straw protect the surface but can be slow to decompose. Wood chips are excellent for paths and perennial areas, yet fresh chips are usually a poor seedbed because they are coarse and may temporarily immobilize nitrogen at the surface as fungi break them down. Keep high-carbon mulch on top of the soil and out of the root zone when establishing annual vegetables.
A new homestead may not have enough compost for every planned bed. In that case, build fewer beds, use the available finished compost where seeds will be sown, and cover the remaining ground with cardboard and a modest protective layer. Buying a large volume of uncertain “topsoil” can introduce stones, weed roots, or persistent herbicide residues. Ask suppliers what the material contains and whether it is screened and compost-based. A no-till approach does not mean every imported soil product is automatically suitable.
Sheet mulch also has limits. Cardboard under a thick wet layer can create a cool, oxygen-poor interface in poorly drained ground, and slugs may find the protected habitat attractive. Lift a corner if the bed stays saturated, and use less material in heavy clay that already drains slowly. The recommended structure is a living surface with roots, air, and water movement—not a sealed stack of layers that prevents the soil from functioning.
Planting, Mulching, and Managing Crops Without Tilling
Planting without tillage means disturbing only the small area needed for a seed or transplant. For a transplant, make a hole through the compost layer with a trowel, place the plant at the appropriate depth, firm the surrounding material, and water the root zone. For direct seeding, rake or smooth the top of the compost rather than mixing the entire bed. Small seeds such as carrots need a fine, stone-free surface; large seeds such as beans and peas can tolerate a less refined bed.
Seed contact is the main practical constraint in a newly sheet-mulched garden. Cardboard, straw, and chunky compost are barriers, not germination media. Sow into the finished compost layer, and avoid placing tiny seeds directly into undecomposed mulch. If seedlings emerge unevenly, inspect whether the surface dried, crusted, or contained large particles. A thin layer of fine compost over the seed row can improve contact without turning the bed.
Mulch after seedlings are established, leaving a small gap around stems. Straw, shredded leaves, and grass clippings can reduce evaporation and slow weed emergence, but each material needs inspection. Grass clippings should be free of lawn herbicide exposure and applied in thin layers so they do not mat. Shredded leaves are useful in autumn, although a heavy wet layer can press down young plants. Mulch is a management tool, not a substitute for observation.
Crop choice affects how forgiving the system will be. Transplanted kale, lettuce, tomatoes, peppers, and squash can perform well in a compost-topped bed because their root balls begin in a prepared pocket. Direct-seeded carrots, parsnips, and onions demand a finer surface and steadier moisture. Potatoes can be planted under a deep organic covering, but the method requires enough material to cover developing tubers and may not suit a wet site. Compare the labor saved from tilling with the labor required for hand-weeding, adding mulch, and managing slugs.
Use the first season to establish soil cover rather than maximizing plant density. Keep beds planted or mulched between crops, and avoid walking on them when wet. If a crop fails, pull diseased plants, cover exposed soil, and replant a suitable succession crop instead of reaching for a rototiller. A practical companion to these methods is No-till gardening methods for a new homestead, particularly when deciding whether a bed needs more compost, finer seed-row preparation, or simply better moisture control.
Troubleshooting No-Till Beds Through the First Season
Early failures usually reveal a mismatch between the material layer and the site. Weeds appearing in straight lines often indicate cardboard gaps or thin coverage. Weeds emerging throughout the compost may have arrived in unfinished manure or compost. Pull annual weeds while small, then add surface mulch; do not cultivate deeply in response, because chopping perennial roots can spread them through the bed.
Slow growth has several possible causes. A thick layer of fresh wood material near roots can reduce available nitrogen at the surface, while cold, wet compost can limit root activity. Pale leaves may reflect nutrient imbalance, poor drainage, root damage, or normal stress after transplanting. Check moisture below the mulch with a finger, inspect roots when replacing a failed plant, and avoid adding fertilizer based only on leaf color. A soil test and a review of watering practices provide better evidence.
Slugs, earwigs, and other shelter-seeking pests may increase beneath damp cardboard or straw. This does not make sheet mulching unusable, but it changes how the bed should be managed. Keep mulch pulled slightly away from tender stems, water near the soil rather than wetting foliage late in the day, and inspect under boards or dense coverings. Hand removal and habitat reduction may be more appropriate for a small homestead plot than broad, indiscriminate treatment.
Compacted paths can push water into beds, especially on sloping ground. Define paths before wet weather, keep traffic on them, and redirect runoff with contour-conscious design rather than digging channels through the growing area. If water stands for days, no amount of compost on top will solve the underlying drainage problem. A shallow diversion, a different bed location, or a raised growing area may be justified, depending on the site.
Use this first-season check at regular intervals:
- Surface: Look for exposed cardboard, crusting, erosion, or mulch piled against stems.
- Plants: Check new growth, root-zone moisture, pest damage, and spacing.
- Soil: Notice whether it accepts water, sheds it, stays saturated, or dries immediately.
- Weeds: Identify whether they come from seams, imported compost, or persistent roots below the barrier.
Do not judge the system only by whether it looks untidy compared with a freshly tilled bed. The useful signs are fewer exposed soil patches, workable planting pockets, improving moisture consistency, and less compaction in the root zone. If those signs are absent, change the material, drainage, or bed size before abandoning no-till gardening altogether.
Frequently Asked Questions
Can a new garden be started without removing grass?
Yes. Cut the grass short, cover it with overlapping cardboard, and add a deep layer of finished compost. Persistent grasses may require repeated edge trimming and follow-up weeding.
How deep should compost be for immediate planting?
Use several inches of finished compost as the planting medium, with enough depth for the crop’s roots. Avoid relying on unfinished material or fresh manure around food crops.
Are wood chips suitable for vegetable beds?
They are generally better for paths and perennial plantings. Keep fresh chips on the surface and away from annual vegetable root zones, where decomposition may temporarily tie up nitrogen.
Should no-till gardeners ever use a shovel?
Yes. No-till means avoiding routine deep soil inversion, not refusing all disturbance. Use a trowel or shovel for planting holes, perennial removal, drainage repairs, or targeted compaction correction.
What is the best first crop for a sheet-mulched bed?
Transplanted crops such as lettuce, kale, tomatoes, or squash are often easier than tiny direct-seeded crops because their roots begin in prepared compost pockets.
Conclusion
Build a new no-till garden around conditions you can verify: adequate sunlight, workable drainage, safe soil, dependable water, and reachable beds. Use cardboard and organic mulch to suppress existing vegetation, but reserve finished compost for the actual planting surface and keep coarse wood chips in paths unless the bed is intended for perennial crops. During the first season, inspect seams, moisture, stems, roots, and weed sources instead of assuming every problem comes from poor soil. Begin with a modest number of beds, keep paths permanent, and expand only after the system remains manageable through a full crop cycle. The next useful step is to test the site, mark one accessible bed, and build it carefully enough that its results can guide the rest of the homestead.