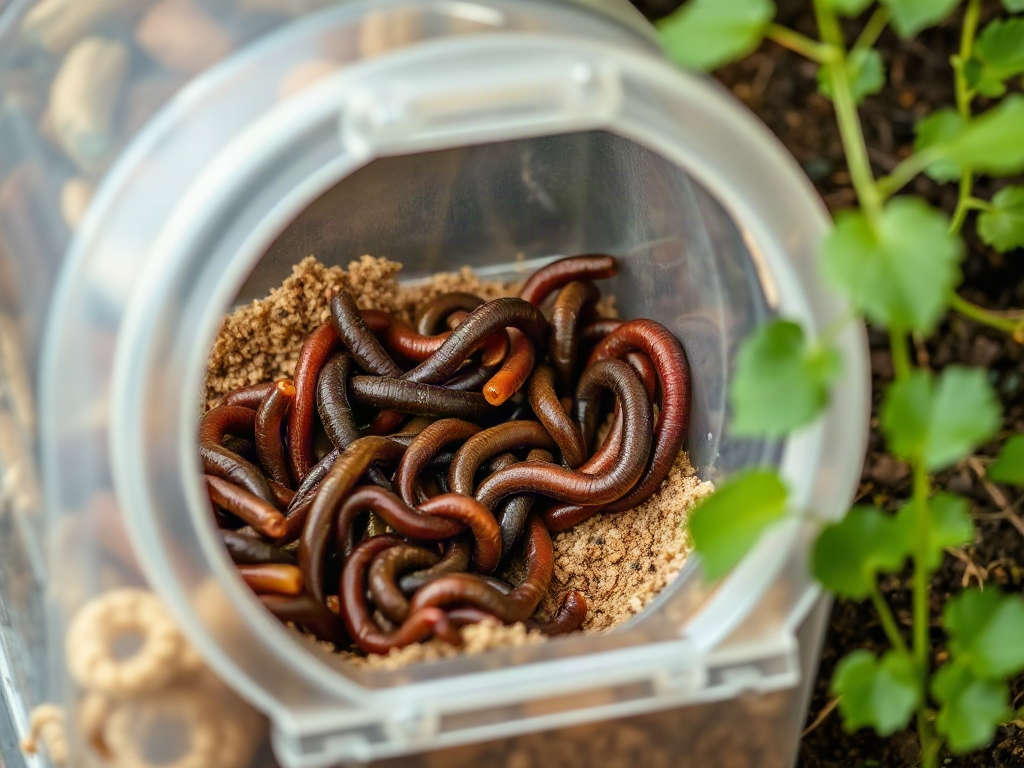
Starting a worm farm for garden compost works best with a ventilated, opaque bin filled with damp bedding, composting worms, and small portions of suitable kitchen scraps. Red wigglers process food near the surface, while shredded cardboard regulates moisture and creates air spaces that discourage sour, anaerobic conditions. Feed only after the previous scraps are mostly disappearing, and keep the bedding as moist as a wrung-out sponge rather than saturated. Dark, crumbly castings, an earthy smell, and active worms indicate a productive bin; persistent odors, escaping worms, or pools of liquid mean the feeding, moisture, or airflow needs correction.
Choose a Bin, Location, and Composting Worm
A useful worm farm begins with a container that suits the amount of food waste available, not the largest bin that will fit. A modest household can begin with an opaque plastic tote roughly the size of a common storage bin. The lid and upper sides need small ventilation holes, while the container should exclude light because composting worms naturally stay beneath covered organic material.
Plastic bins retain moisture and are inexpensive, making them practical for beginners. Wood breathes more freely but may dry out faster and eventually deteriorate. Stacking commercial systems can simplify harvesting, although worms do not always migrate between trays on schedule. A single tote is usually easier to observe while learning how quickly the colony eats and how the bedding responds to changing temperatures.
Use composting species rather than worms dug from ordinary garden earth. Red wigglers, commonly sold as composting worms, live in rich material near the surface and tolerate the crowded conditions of a bin. Deep-burrowing garden worms are adapted to mineral soil and generally perform poorly in shallow bedding. Buy worms from a reputable composting supplier so the species and shipping conditions are clear.
Place the bin where temperatures remain moderate and direct sun cannot heat the container. A shaded porch, insulated garage, utility space, or protected basement may work, provided the location does not freeze or become excessively hot. A dark plastic tote in afternoon sun can heat far beyond the surrounding air. Outdoor placement also requires protection from heavy rain, which can enter ventilation holes and saturate the bedding.
Match the location to how often it will be checked. A remote shed may keep the bin out of sight, but overlooked food accumulation and seasonal temperature swings become more likely. Keeping the system conveniently close makes it easier to inspect moisture and feed conservatively. For a first worm farm for garden compost, accessibility is usually more valuable than maximum capacity.
Build Bedding That Balances Moisture and Air
Bedding serves as the worms’ habitat, moisture reservoir, and major carbon source. Shredded corrugated cardboard, plain paper, torn paper egg cartons, aged leaves, and a small amount of finished compost can form a workable mixture. Avoid glossy or heavily coated paper. Tear or shred bulky materials so they absorb water evenly while still leaving irregular spaces through which air can move.
Moisten the bedding before adding it to the bin. It should feel like a wrung-out sponge: damp throughout, but not releasing a stream when squeezed. Dry bedding pulls moisture away from worms, while waterlogged material fills air spaces and encourages anaerobic decomposition. That oxygen-poor breakdown produces the sour or rotten odor often blamed on worms, even though the underlying problem is usually excessive water or food.
Fill much of the bin loosely rather than pressing the bedding into a dense mat. Mix in a handful of mature compost or garden soil to introduce microorganisms and fine mineral particles. Only a small amount is needed; filling the container with soil makes it heavy, compact, and less suitable for surface-dwelling composting worms. The worms consume microbe-rich decaying material rather than needing ordinary earth as their main home.
After adding the worms, leave the bin under light for a short period with the lid open, provided temperatures are safe. Their aversion to light encourages them to settle into the bedding. Then cover the surface with a layer of damp cardboard or several sheets of moist newspaper and close the ventilated lid. The surface cover reduces evaporation, discourages flies, and keeps newly added food buried.
A common mistake is drilling numerous drainage holes and relying on a catch tray to manage excess liquid. A properly balanced bin should not routinely produce runoff. Liquid collecting below the bin carries decomposing residues and may become anaerobic; it should not automatically be treated as finished worm tea. Correct the moisture source instead by removing standing liquid, mixing in dry shredded cardboard, and reducing watery scraps. Successful bedding stays springy and aerated rather than muddy.
Feed the Worm Farm Without Overloading It
Feeding should follow the colony’s processing rate rather than a fixed household schedule. Begin with a small pocket of scraps buried beneath several inches of bedding. Check that pocket after a few days. If recognizable food remains plentiful, wait before adding more; if it is collapsing into dark material, place the next small feeding in another part of the bin.
Suitable inputs include vegetable trimmings, fruit scraps, coffee grounds in moderation, tea leaves removed from noncompostable bags, crushed eggshells, and small amounts of plain cooked grains. Chopping or freezing and thawing tough scraps increases exposed surface area, allowing microorganisms to colonize the food more quickly. Faster decomposition does not justify adding larger portions, however. A new colony has limited capacity and may take time to settle after transport.
Keep meat, fish, dairy products, oily leftovers, and heavily salted foods out of a simple household bin. These materials can create strong odors and attract pests before worms process them. Large quantities of citrus, onion, garlic, or spicy food may also make a small feeding zone harsh, so use them sparingly or send them to another composting system. Diseased plant material, pet feces, and scraps exposed to persistent pesticides are poor choices for castings intended for edible beds.
A compact feeding routine prevents many failures:
- Inspect first: Look for uneaten scraps, odor, insects, and excess moisture.
- Bury a small portion: Place food below the surface instead of scattering it on top.
- Rotate locations: Move around the bin so one area does not become saturated.
- Add dry bedding: Cover moist food with shredded cardboard to absorb released water.
- Wait for evidence: Increase portions only when earlier feedings are disappearing reliably.
Overfeeding is more damaging than temporarily underfeeding. Worms can consume bedding and established organic material between additions, but a mound of wet scraps can ferment, heat up, and exhaust oxygen. Fruit flies also reproduce in exposed food. When following Starting a worm farm for garden compost, treat feeding as an observed response rather than a promise to dispose of every kitchen scrap.
Monitor the Bin and Correct Common Problems
A healthy worm bin smells earthy, contains damp but loose bedding, and has worms distributed through the upper material. Scraps gradually lose their shape, while the surrounding bedding becomes darker and finer. Worm activity may not be visible until the surface is lifted, so a quiet bin is not necessarily failing. Condition, smell, and food disappearance are more useful measures than seeing worms through the sides.
A rotten odor calls for immediate inspection. Remove large pockets of spoiled food, loosen compacted material, and blend in dry cardboard. Leave the lid ajar briefly in a pest-safe location if the bin is extremely wet, but do not let the bedding dry out. Adding more worms will not repair an oxygen-starved bin; the physical balance must be restored first.
Worms gathering on the walls or trying to escape can signal saturation, heat, severe acidity, or a recent disturbance. Check whether the container is warm in the center, whether liquid is pooling at the bottom, and whether a large acidic feeding was added. Correct the identifiable condition instead of applying several remedies at once. For example, if the bedding is dripping wet after a melon-heavy feeding, remove excess fruit and add dry carbon rather than adding water or another meal.
Small flies usually indicate exposed or excessive food. Bury fresh scraps completely, cover the surface with damp cardboard, and pause feeding until existing material is processed. Freezing kitchen scraps before use can interrupt insects carried in on produce, although adults already in the room still need to be excluded. Ants are more often associated with dry conditions or accessible sweet scraps; restoring even moisture and relocating the bin away from an ant trail may help.
Temperature deserves attention before seasonal extremes. Insulation can slow cooling, but it does not generate dependable heat in a small colony. During hot weather, move the bin before it overheats rather than trying to cool it after worms become stressed. A location comfortable across the season is safer than repeated emergency adjustments.
Change only one or two conditions, then observe the response. Constantly stirring the entire bin, adding powders, or flooding it to correct suspected acidity disrupts the habitat and makes diagnosis harder. A measured approach to Starting a worm farm for garden compost relies on visible evidence: moisture in a squeezed handful, the smell beneath the cover, remaining food, and worm location.
Harvest and Use Worm Castings in the Garden
Castings are ready to separate when much of the original bedding has become dark, fine, and soil-like, with few recognizable food pieces. The material will not necessarily be perfectly uniform because worms, cocoons, unfinished cardboard, and castings coexist in an active bin. Waiting for every fragment to disappear can leave the colony with too little fresh bedding, so harvesting is a practical separation rather than a purity test.
For a small tote, move finished material to one side and place fresh moist bedding and food on the other. Over time, many worms migrate toward the new feeding area, allowing castings to be removed from the older side in stages. This method is slower but causes less disruption. A faster option is to form small piles under bright indirect light and repeatedly remove the outer layer as worms retreat toward the center. That approach requires more handling and works best with modest quantities.
Return visible worms and cocoons to the refreshed bin. Mix harvested castings into garden soil, blend a modest amount into potting mixes, or apply a thin layer around established plants before watering. Castings are a biologically active amendment, not a complete substitute for every nutrient a crop may require. Their value lies in adding stable organic material and fine-textured, microbe-processed residues; garden fertility still depends on the existing soil, crop demand, and other amendments.
Avoid piling thick, wet castings against plant stems or using an undiluted mass as the sole container medium. Fine material can stay overly wet in pots, particularly where drainage is limited. If unfinished food is mixed through the harvest, return that portion to the bin rather than burying it beside seedlings, where decomposition may attract pests.
Refresh the worm farm immediately after harvesting with moist bedding and a conservative feeding. Signs of a successful reset include worms moving into the new material, no sharp odor, and food beginning to soften without forming a wet pocket. Regular partial harvests are often easier than emptying the entire system because they preserve an established habitat and reduce the number of worms that must be sorted at once.
Frequently Asked Questions
How many worms should a beginner buy?
Start with a modest quantity suited to the bin and feed lightly while the colony adjusts. Supplier guidance can help match the worm quantity to container size, but actual feeding should be based on how quickly scraps disappear.
Can earthworms from the garden live in a worm bin?
Garden earthworms are often deep-soil species and may not thrive in shallow organic bedding. Red wigglers or another verified composting species are better adapted to crowded, food-rich bins.
How often should a worm farm be fed?
Inspect the previous feeding before adding more. Feed when most scraps are breaking down, rather than following a rigid daily schedule; new or cool bins generally process food more slowly.
Why is liquid collecting under my worm bin?
Collected liquid usually indicates overly wet bedding, excessive watery food, or inadequate airflow. Remove standing liquid, add dry shredded cardboard, and reduce feeding instead of treating the runoff as finished worm tea.
When can worm castings be added to the garden?
Harvest when the bedding is mostly dark, crumbly, and difficult to distinguish from the processed material. Separate obvious food and worms, then mix the castings into soil or apply a thin layer around plants.
Conclusion
A dependable worm farm is managed by observation rather than by how much waste fits in the container. Begin with composting worms, loose damp bedding, ventilation, and a location protected from temperature extremes. Offer one small buried feeding, then let food disappearance determine the next portion. An earthy smell and springy bedding show that moisture and oxygen are in balance; sour odors, runoff, flies, or escaping worms call for less food and a closer check of conditions. Once the contents become dark and crumbly, harvest a portion while preserving enough worms and established material to restart the bin. The best next step is simple: prepare the bedding first, add the worms, and keep the first week’s feeding deliberately small.