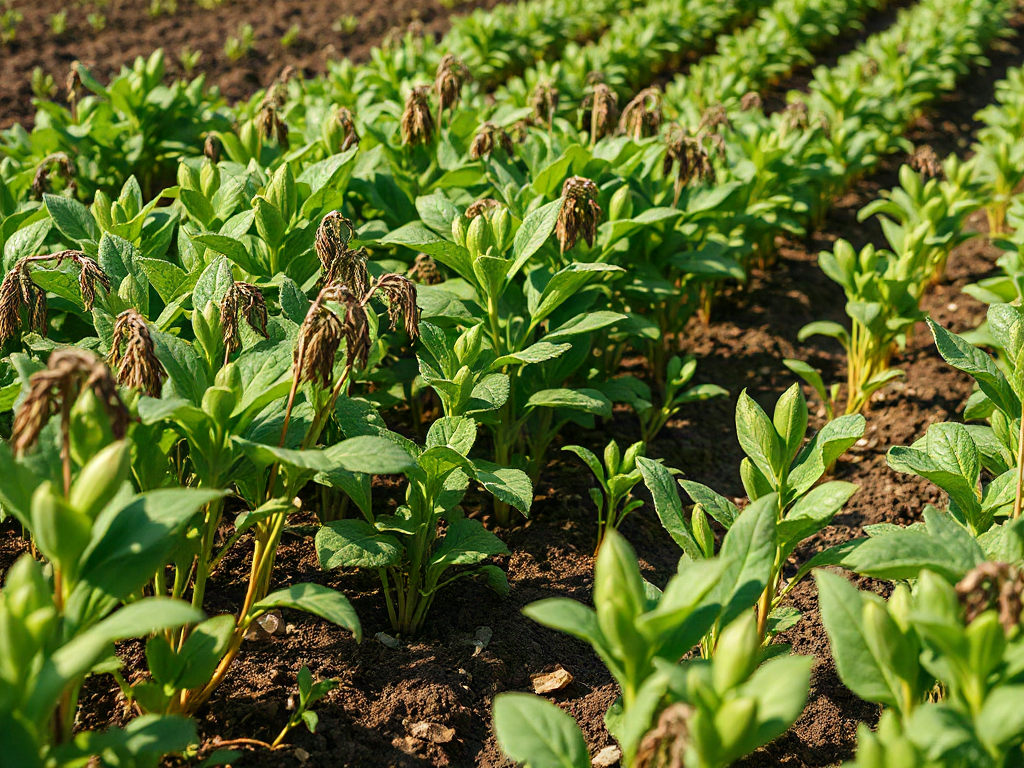
Farming basics part three for new homesteaders centers on managing crops after planting through consistent field checks, useful records, timely intervention, and harvest decisions based on crop maturity rather than guesswork. Walk each growing area on a fixed schedule, inspect leaves and soil closely, and record rainfall, irrigation, pests, weeds, and yields by bed or row. Correct small problems before expanding production, especially uneven watering, exposed soil, unchecked insect damage, and harvests that exceed storage capacity. These habits reveal which crops suit the site, where labor is being lost, and whether next season should involve expansion, adjustment, or fewer plantings.
Use Crop Records to Replace Guesswork
A working farm record should show what happened in a particular bed, row, pasture, or enclosure—not merely what was supposed to happen. Memory becomes unreliable once several crops, planting dates, weather events, and pest problems overlap. A notebook, spreadsheet, or weather-resistant field clipboard can all work, provided the system is simple enough to update during busy weeks.
Record the crop and variety, planting date, seed source, bed or row location, major soil amendments, rainfall or irrigation, pest observations, harvest dates, and usable yield. For livestock-adjacent growing areas, note grazing or manure applications as well. Measurements do not need laboratory precision. “Two five-gallon buckets of marketable potatoes from 20 row feet” is more useful than “good potato harvest,” because it allows a fair comparison with another row or season.
Separate observations from conclusions. Yellow lower leaves are an observation; nitrogen deficiency is only one possible explanation. Saturated roots, disease, normal aging, or physical damage may create a similar appearance. Writing down soil moisture, recent weather, affected plants, and the pattern across the bed reduces the risk of applying fertilizer to a drainage problem. Photographs taken from the same location can add useful visual evidence, especially for slow changes in plant color or vigor.
A compact record routine can follow four priorities:
- Map the location: Give every growing area a stable name or number.
- Log meaningful events: Record planting, irrigation, amendments, pest pressure, and harvest.
- Measure an outcome: Track usable produce, losses, labor, or feed value.
- Review before reordering: Compare varieties and locations before buying next season’s seed.
The common failure is creating a detailed system that cannot survive the workload of summer. A beginner may design a page with dozens of fields, then stop using it by June. Five minutes of consistent notes twice a week produces better evidence than an elaborate but abandoned journal. The record should help answer practical questions: Which bed dries first? Which bean variety yielded through heat? How much produce was discarded because it matured at once?
These notes also keep expansion honest. If three beds already generate more squash than the household can eat, preserve, or sell, doubling the planting is not progress. Readers following Farming basics part three for new homesteaders can treat the first full season as a measured trial, using results rather than enthusiasm to determine the next increase in scale.
Make a Productive Field-Check Routine
A field check is a slow, repeatable inspection of crops, soil, water systems, fencing, and nearby habitat. Looking across a plot from the gate may reveal wilted plants or livestock intrusion, but it misses early insect eggs, broken drip fittings, stem damage, and weeds about to set seed. Walk close enough to examine both sides of leaves and the soil beneath the canopy.
Inspect on a predictable schedule and add extra checks after strong wind, heavy rain, unusual heat, or irrigation repairs. Morning is useful for seeing overnight animal damage and plant condition before afternoon heat. Late-day checks can expose pressure drops at the far end of an irrigation line. Changing the route prevents the nearest rows from receiving all the attention while distant corners deteriorate unnoticed.
Start with the whole-area pattern. A single stunted tomato plant suggests a localized root, transplant, or disease issue. A strip of weak tomatoes along one edge points more strongly toward shade, compaction, water distribution, or a difference in soil. If every plant at the end of a drip line is wilted, inspect flow before assuming the entire planting needs more irrigation. Pattern recognition prevents a broad treatment from being applied to a narrow problem.
A Short Inspection Sequence
Look first for safety and infrastructure failures: open gates, sagging electric fence, leaking hoses, damaged trellises, standing water, or exposed wire. Then examine plant vigor, new leaf growth, flowering, fruit set, weeds, chewing, discoloration, droppings, tracks, and disease-like lesions. Check a few plants in several locations rather than studying only the worst specimen. Mark affected areas with flags so their progression can be compared during the next walk.
Do not immediately spray or remove every unfamiliar insect. Some insects are pollinators, predators, or harmless visitors. Identify the organism, estimate how widely damage is occurring, and consider the crop stage before choosing a response. Hand removal may be realistic for a few hornworms on a short tomato row; it is less realistic across a large planting. Likewise, sacrificing one badly affected plant may protect time and attention better than repeatedly treating it without a clear diagnosis.
Success is visible when problems remain localized, repairs happen before crop stress spreads, and records show whether an action worked. Failure appears as repeated emergency watering, the same fence breach, expanding damage without identification, or treatments that leave the pattern unchanged. A field walk earns its time only when observations lead to a specific next check or action.
Control Weeds, Water, and Fertility During Growth
Midseason crop care is a competition-management task: cultivated plants need enough access to light, root space, moisture, and nutrients to reach harvest. Weeds, poor irrigation distribution, bare soil, and poorly timed fertilizer can redirect those resources. The best response depends on crop size, weather, soil texture, and the labor available that week.
Young weeds are cheaper to control than established ones. A shallow hoe pass on a dry morning can sever small weeds with little soil disturbance, while waiting two weeks may require hand pulling around crop roots. Mulch can suppress later germination and reduce soil splash, but it should not be placed against plant stems or applied over dry soil with the assumption that moisture will somehow return. Water first when needed, then apply clean straw, leaves, or another suitable material while leaving airflow around stems.
Water according to root-zone conditions rather than surface appearance alone. The top layer can look dry while moisture remains below, especially beneath mulch; clay soil may appear acceptable at the surface while staying saturated around roots. Use a trowel or finger to inspect several inches down near representative plants. Compare the beginning and end of drip lines, sunny edges, raised beds, and low ground because one reading does not represent an entire property.
Deep, appropriately spaced irrigation generally encourages roots to use a larger soil volume, but rigid schedules are unreliable. Newly seeded beds, shallow-rooted crops, containers, sandy ground, and mature plants in clay all behave differently. During hot weather, a seedling row may need close attention while established squash nearby remains adequately supplied. The mistake is turning on every zone for the same duration, regardless of flow rate, crop stage, or soil.
Fertility corrections deserve similar restraint. More fertilizer does not repair compaction, waterlogging, root injury, or an unsuitable soil pH. Excess nitrogen can promote lush vegetative growth at the expense of fruiting in some crops, while soluble nutrients may move beyond shallow roots if overwatered. Use a soil test from a reputable laboratory or local extension service when persistent growth problems affect an area. Keep manure and compost records, and follow appropriate handling intervals and local guidance when raw manure is used around food crops.
A practical priority order is to stop active damage, restore correct moisture, control weeds before seed production, and only then consider nutrient correction. For example, pale corn in a low patch after repeated rain should prompt a drainage and root-zone check before additional nitrogen. By contrast, uniformly weak growth in a well-drained bed with documented low fertility may justify a measured amendment. The broader Farming basics part three for new homesteaders approach favors diagnosis over routine inputs, protecting both the budget and the growing area.
Harvest at the Right Stage and Measure the Result
Harvest timing should match the crop’s intended use, not an arbitrary calendar date. Snap beans and summer squash are usually picked while tender; dry beans remain until pods mature and conditions permit drying. Tomatoes intended for immediate meals can ripen further on the plant than fruit that must travel or sit for several days. Potatoes for fresh use may be dug earlier than a storage crop whose skins need time to set.
Check several maturity signals together: size, color, texture, ease of separation, seed development, and the number of days since flowering or planting. Seed-packet maturity dates are planning estimates rather than guarantees because temperature, moisture, fertility, transplant stress, and variety performance alter the schedule. Taste is a valuable test for crops such as peas, sweet corn, melons, and root vegetables, but one sample should not automatically trigger the harvest of an entire planting.
Plan the destination before picking. Produce deteriorates quickly when left in direct sun, piled too deeply, washed unnecessarily before storage, or placed in conditions that do not suit the crop. Tender greens need prompt cooling, while cured onions and winter squash require dry handling and adequate airflow. Root crops damaged by forks or shovels should be separated for early use rather than placed among sound storage specimens.
Measure marketable or usable harvest rather than total biological production. A basket containing cracked tomatoes, insect-damaged peppers, and sound fruit may look abundant, yet only part of it meets the household’s preservation or sale needs. Record what was eaten, stored, preserved, fed to animals where appropriate, sold, donated, or discarded. This distinction exposes whether a production problem occurred in the field or whether too much matured for the available kitchen, refrigeration, customers, or labor.
Consider a household that plants one long row of cucumbers at once. The vines may produce heavily, but missed picking leads to oversized fruit, declining quality, and hours of preservation work during the same week. Two or three smaller sowings can distribute the harvest, though later plantings may face different pest pressure or weather. Staggering is not automatically better; it trades concentrated work for a longer care season.
A sound result is not simply the largest yield. It is a useful harvest produced without exhausting the household, depleting the growing area, or filling storage with food unlikely to be used. At season’s end, compare yield, quality, labor, losses, and storage performance by crop. Keep varieties that earned their space, reduce crops that created chronic surplus, and investigate failures before purchasing more seed or equipment. That review turns one season’s work into a clearer production decision for the next.
Frequently Asked Questions
How often should a new homesteader inspect crops?
Walk growing areas at least several times each week and after severe weather, irrigation failures, or animal intrusion. Fast-growing vegetables and newly planted beds may need daily checks during heat or peak harvest.
What farm records are worth keeping during the first year?
Record crop variety, location, planting date, water and amendment events, pest observations, harvest dates, usable yield, and losses. A short record maintained consistently is more valuable than a complicated form that is abandoned.
Should fertilizer be applied when crop leaves turn yellow?
Not automatically. Check soil moisture, drainage, root condition, pest damage, and the pattern of affected plants first. A soil test can help when weak growth persists across a defined area.
How can a homesteader tell whether irrigation is adequate?
Inspect moisture within the active root zone at several points, including line ends, sunny borders, and low spots. Combine that check with plant condition and actual irrigation output rather than relying only on a timer.
What should be done with more produce than the household can use?
Prioritize safe storage or preservation, then consider timely donation, sale where permitted, or appropriate livestock use. Record the surplus and reduce or stagger that crop’s planting next season.
Conclusion
Reliable production grows from observation and adjustment, not from adding acreage at the first sign of success. Give each bed or row a name, keep a brief event and harvest log, and inspect crops closely enough to notice patterns before acting. Moisture, weeds, fertility, pests, and maturity interact, so correcting the wrong factor can waste money while the original problem spreads.
For the next growing week, establish one field-walk route, test root-zone moisture in several locations, mark any recurring damage, and identify where each current crop will go after harvest. At season’s end, compare usable yield with labor and losses rather than judging by appearance alone. Expand only the crops and systems that fit the land, available time, storage, and household demand; revise or remove those that repeatedly consume more resources than they return.