An EarthBox planting guide for small-space homesteaders should match crop counts to mature plant size, use fresh potting mix rather than garden soil, place a continuous fertilizer strip on top, and keep the water reservoir supplied through the fill tube. Large crops such as tomatoes usually need the entire box, while compact greens and herbs can share closer spacing. Keep the aeration screen and overflow opening clear so roots receive both moisture and oxygen. Refill only when water exits the overflow hole, support tall plants early, and inspect leaves and reservoir use to catch crowding, nutrient, or watering problems.
How the EarthBox Watering System Works
An EarthBox functions as a sub-irrigated container: water sits beneath the potting mix, and moisture moves upward into the root zone through the system’s wicking areas. The aeration screen separates most of the mix from the reservoir, leaving an air space that ordinary waterlogged pots lack. An overflow opening limits the reservoir level, while the fill tube lets the gardener add water without soaking leaves or eroding the surface.
That arrangement is valuable on a balcony, patio, driveway, or compact urban lot because it reduces runoff and stretches the interval between watering sessions. It does not make the container maintenance-free. A fruiting tomato in hot, windy weather may use the stored water rapidly, while young lettuce under mild conditions may draw it down slowly. Reservoir capacity reduces watering volatility; it does not cancel the effects of plant size, temperature, wind, and sun exposure.
The box should sit level so the overflow opening represents the same water depth across the reservoir. A pronounced slope may leave one side relatively dry and the other too wet. Keep the overflow opening unobstructed rather than plugging it to retain extra water. Raising the water above the intended level can reduce root-zone oxygen and turn a moisture-saving design into a saturated container.
Sun exposure deserves equal attention. Fruiting vegetables generally need strong direct light, but a container against a reflective wall can experience more heat than a bed a few feet away. Leafy crops may perform better with morning sun and some late-day protection during hot weather. Conversely, placing a tomato in bright shade to reduce water use usually trades manageable irrigation demands for weak growth and poor fruit production.
Before filling the box, confirm that the aeration screen, fill tube, and overflow opening are correctly seated and free of old roots. Pack moistened mix firmly into the designated wicking areas, but do not compress the entire container into a dense block. The aim is dependable contact between reservoir moisture and potting mix while preserving pore space for air. That physical balance is the foundation of a productive EarthBox planting guide for small-space homesteaders.
Potting Mix, Fertilizer, and Initial Setup
A lightweight potting mix is the correct growing medium because it can wick moisture while retaining air around roots. Native garden soil, topsoil, and heavy compost blends compact too readily in this system. A mix sold for containers commonly includes peat moss or coir plus aerating ingredients such as perlite or pine bark. Reused mix can remain serviceable if it is loose, drains properly, and is free of serious disease problems, but decomposed material that has collapsed into a dense mass should be replaced or substantially refreshed.
Moisten dry mix before loading it. Material that is extremely dry may repel water at first, leaving irregular wet and dry zones even above a full reservoir. Add mix in stages, distribute it into corners, and settle it with light hand pressure. Fill the wicking areas more firmly than the upper root zone. Avoid pounding down every layer; excessive compaction undermines the air-water balance the container is designed to provide.
The standard EarthBox method uses a measured band of dry fertilizer placed near the surface rather than stirred through the entire root zone. Follow the current instructions supplied for the specific EarthBox model and fertilizer product because formulations and box configurations can differ. Keep the fertilizer in a continuous strip and position seedlings according to the chosen crop layout. Mixing a concentrated fertilizer charge throughout the container may expose new roots to excessive salts instead of feeding them gradually.
Some setup directions call for dolomitic lime, particularly with peat-based media and crops such as tomatoes. Lime is not a universal annual ritual. It changes pH and contributes calcium and magnesium, so repeated additions without considering the condition of reused mix can push chemistry in an unhelpful direction. Consult the manufacturer’s current directions and, when persistent nutrient symptoms occur, consider a media test rather than stacking amendments based on appearance alone.
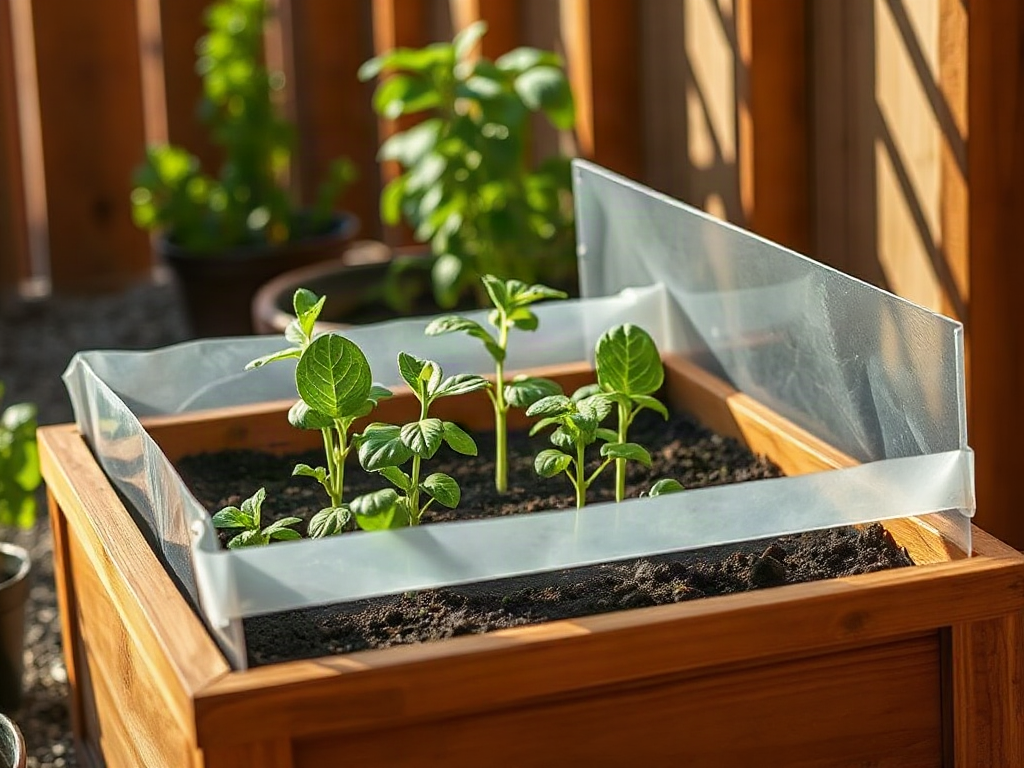
After planting, cover the surface as directed for the system. The cover limits evaporation, discourages weeds, and protects the fertilizer band from direct rainfall. Cut openings only large enough for stems and expected growth. A wide exposed area loses more moisture and can allow heavy rain to disturb the nutrient zone. Label the planting date and cultivar on the box; those two details make later judgments about slow growth, maturity, and seasonal replacement much more reliable.
Crop Counts and Spacing by Plant Size
Plant count should be based on mature canopy and root demand, not on how empty the box looks after transplanting. A young tomato occupies little surface area, yet a vigorous indeterminate plant can eventually dominate the container, shade neighbors, and consume the reservoir quickly. The manufacturer’s layout for the particular crop and EarthBox model should be the starting point because container dimensions and recommended arrangements are not identical across products.
For a standard full-size box, two tomatoes are a commonly used maximum, while a single especially vigorous tomato may be the more manageable choice for a small patio. Similar caution applies to eggplants, peppers, cucumbers, squash, and other large fruiting plants. Compact cultivars can permit a denser arrangement, but a label such as “patio” or “bush” should be checked against the plant’s stated mature spread rather than treated as permission to fill every opening.
Leaf crops and smaller roots generally allow higher counts. Lettuce, spinach, radishes, scallions, and compact herbs can be arranged in rows or staggered patterns, provided each plant has enough light and airflow. Mixing crops works best when their growth rate and size are compatible. Fast radishes between young lettuces can be removed before the lettuces expand. Basil tucked beside an indeterminate tomato is less predictable because the tomato may soon shade it and monopolize water and nutrients.
Use this compact decision checklist before setting transplants:
- Canopy: Will mature leaves overlap so heavily that inner foliage stays shaded and damp?
- Water demand: Will all plants tolerate the same consistently moist root environment?
- Season length: Can an early crop be removed before a larger neighbor claims its space?
- Support: Is there room for a cage or trellis without blocking access to the fill tube?
- Access: Can fruit be picked and damaged leaves removed without moving the entire box?
Small-space homesteaders often gain more useful food from succession than from crowding. Six healthy lettuces followed by basil may outperform an overloaded box where twelve lettuces compete, remain undersized, and bolt together. Seed a replacement tray before the first crop is finished, then reset open positions as plants leave the box. The crop layouts in an EarthBox planting guide for small-space homesteaders are capacity limits to evaluate, not targets that must be filled regardless of cultivar or climate.
Refilling, Supporting, and Monitoring Crops
Reservoir refilling should respond to plant use rather than a rigid calendar. Add water slowly through the fill tube until it begins to emerge from the overflow opening, then stop. During cool establishment weather, that point may be reached infrequently. A mature tomato carrying fruit in summer can empty the reservoir much faster, so the same box may require daily checks during heat, wind, or peak production.
Do not interpret every wilted leaf as proof that the reservoir is empty. Plants can droop briefly during the hottest part of the day even when moisture is available, then recover as temperatures fall. Check whether the reservoir accepts a substantial amount of water and inspect the potting mix beneath the cover. Persistent morning wilt, a reservoir that empties unusually fast, or crispy leaf margins points toward water stress. Yellowing, soft growth in saturated mix, or an overflow that never stops after rain may indicate blocked drainage or excessive water rather than drought.
Top-watering is most useful at transplanting, when the upper root ball needs direct moisture before roots connect fully with the wicking zone. After establishment, routine filling through the tube preserves the intended bottom-up supply. Repeatedly pouring water over the fertilizer strip can move concentrated nutrients unpredictably. An uncovered box exposed to prolonged rainfall also loses some control over moisture and fertility, which is why the surface cover and open overflow path matter.
Install support while plants are small. Tomato cages, staking systems, or trellises become difficult to add after stems have sprawled and roots fill the mix. Secure tall supports so wind loads are not transferred to a lightweight container that can tip. On an elevated balcony, account for the filled weight of the box and obtain appropriate guidance about load limits; wet media, stored water, plants, and support hardware together weigh far more than the empty unit.
A quick weekly inspection should include the fill tube, overflow opening, cover, leaf undersides, stem ties, and contact points between foliage. New growth with normal color, steady reservoir use, and flowers or leaves appropriate to the crop indicate that the system is functioning. Sudden changes deserve investigation. Marking refill frequency on a calendar provides a practical baseline: a sharp increase can reflect hotter weather or a larger canopy, while an unexpected decrease may signal root decline, cool conditions, or a clogged pathway.
Troubleshooting an Underperforming EarthBox
Poor EarthBox performance is best diagnosed by separating water, roots, fertility, light, and plant load instead of adding amendments immediately. Similar symptoms can have different causes. Yellow lower tomato leaves may accompany normal aging, low nitrogen availability, prolonged saturation, root damage, or disease. A random dose of fertilizer can worsen the situation if excess salts or impaired roots are already limiting uptake.
Begin with the physical system. Verify that water can enter through the fill tube and leave through the overflow opening. Look beneath the cover to see whether the mix is evenly moist rather than swampy or dusty. If a newly planted box remains dry above a full reservoir, the wicking areas may not have been packed adequately or the original mix may have resisted wetting. Carefully moistening the upper mix can bridge the establishment period, but a persistent failure may require resetting the media and wick contact.
Next, assess light and crowding. Long stems, pale leaves, and plants leaning toward one direction commonly indicate insufficient light. Dense foliage with weak airflow raises the likelihood that leaf diseases will spread, especially when leaves remain wet. Pruning can improve access and airflow for suitable crops, but severe overcrowding is not corrected by repeatedly stripping healthy foliage. Removing the weakest plant may protect the production of the remaining plants.
Check pests before blaming the container. Aphids, whiteflies, mites, caterpillars, and other pests can damage EarthBox crops just as they damage raised-bed crops. Examine leaf undersides and growing tips rather than relying on a distant glance. Identify the pest before choosing a response, and follow product labels if a treatment is used. Container culture makes inspection easier, but it does not create immunity from insects or disease.
At season’s end, discard diseased plant debris rather than mixing it into the box. Remove old roots, clean the reservoir components, and evaluate whether the medium remains springy and porous. Reusing sound mix can reduce cost, but repeatedly topping up collapsed media with compost does not necessarily restore aeration. Keep notes on cultivar, count, sun exposure, and reservoir demand. Those records reveal whether a disappointing crop came from the system or from a variety poorly suited to the available space and season.
Frequently Asked Questions
Can regular garden soil be used in an EarthBox?
No. Garden soil commonly compacts and interferes with both wicking and root aeration. Use a lightweight container potting mix compatible with the manufacturer’s directions.
How often should an EarthBox reservoir be filled?
Fill through the tube until water exits the overflow opening, then check according to weather and crop demand. Large summer crops may need daily attention, while young or cool-season plants use less.
How many tomato plants fit in one EarthBox?
Two are commonly grown in a standard full-size model, but one vigorous indeterminate tomato can be easier to support and may use the available light and water more effectively.
Should fertilizer be mixed throughout the potting mix?
The standard method places the specified fertilizer in a surface band rather than distributing it through the root zone. Follow the current directions for the box model and fertilizer formulation.
Can potting mix be reused for another season?
Yes, if it remains porous and the previous crop had no serious disease. Remove roots, refresh lost volume appropriately, clean the box components, and avoid automatic amendment additions without assessing the mix.
Conclusion
A productive EarthBox begins with an intact reservoir system, porous potting mix, and a crop count that respects mature size. Treat the overflow opening as a safeguard, not a drain to block, and place fertilizer according to the current instructions rather than improvising a concentrated blend around young roots. Once plants are established, track reservoir use, provide support before stems sprawl, and inspect changes in leaf color or growth before applying a correction. Small-space production improves when boxes are assigned by compatible water demand and canopy size, with quick crops replaced in succession instead of packed beyond capacity. For the next setup, choose the crop first, confirm its recommended layout, prepare the wicking areas carefully, and record refill frequency so later decisions are based on the box’s actual performance.