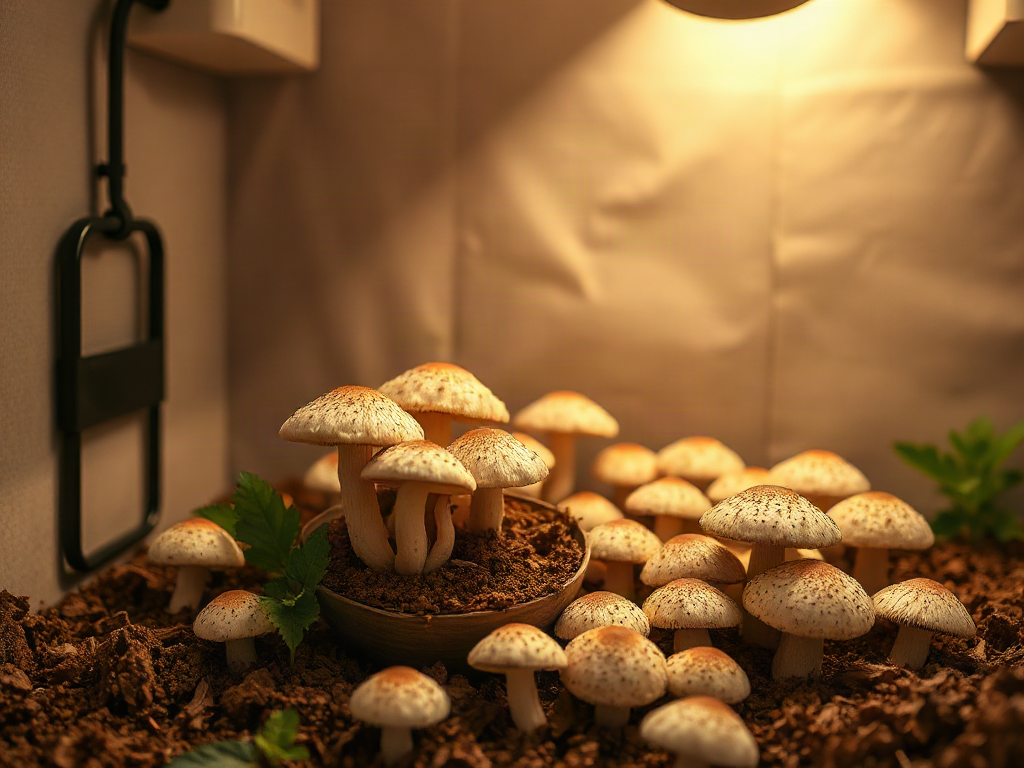
Mushroom growing equipment for a small homestead should provide separate areas for clean inoculation, incubation, and fruiting while controlling humidity, fresh air, temperature, and contamination. A practical setup uses washable shelving, food-safe substrate containers, a humidifier, ventilation fan, environmental monitors, and a pressure canner or sterilizer when the chosen substrate requires sterilization. Beginners can reduce cost and complexity by buying prepared spawn and growing oyster mushrooms in pasteurized straw or pellets. Spend first on cleanable surfaces and dependable climate monitoring; decorative grow tents, automated controllers, and laboratory equipment can wait until production volume justifies them.
Divide the Workflow Into Clean, Incubation, and Fruiting Areas
A reliable mushroom operation separates clean work from wet fruiting work, even when the entire setup occupies only part of a shed or spare room. Inoculation exposes prepared substrate to mushroom spawn, so airborne dust, soil, animal bedding, compost particles, and mold spores are liabilities. Incubation then needs stable conditions and minimal disturbance, while fruiting produces high humidity, spores, and water droplets that do not belong near clean supplies.
The three areas do not need to be separate buildings. A small homestead might use a cleaned kitchen table for inoculating purchased pasteurized blocks, a lidded shelving cabinet for incubation, and a grow tent in a utility room for fruiting. Another workable arrangement uses opposite ends of an insulated shed, with inoculation scheduled before any harvesting or cleaning. Physical distance helps, but workflow matters just as much: handle clean supplies first, close the inoculated containers, and only then enter the fruiting area.
The clean station needs a smooth table, bright task light, disposable gloves, 70 percent isopropyl alcohol for suitable surfaces, paper towels, and containers that keep tools protected between uses. Alcohol is flammable, so it must remain away from flames, hot surfaces, and active heating equipment. A still-air box can provide a calmer workspace for agar or grain-spawn work, but it is not a sterile chamber. A laminar-flow hood is expensive and generally unnecessary for a homesteader inoculating commercial fruiting blocks or mixing purchased spawn into pasteurized substrate.
Incubation equipment is simpler: sturdy shelving, a thermometer, labels, and protection from pests and large temperature swings. Many species do not need complete darkness, and adding heaters without measuring room conditions can overheat the center of dense bags. Metabolic activity produces heat inside colonizing substrate, so the temperature of the room does not tell the whole story. Leave space between bags rather than packing them tightly together.
Fruiting belongs on corrosion-resistant shelves over a waterproof floor or tray. Carpet, exposed drywall, stored feed, and untreated wood are poor neighbors because persistent moisture can damage the room and provide places for unwanted fungi to establish. Before buying Mushroom growing equipment for a small homestead, map the direction in which people, tools, water, and harvested mushrooms will move. A layout that keeps dirty tasks downstream is more valuable than an elaborate collection of gadgets in one crowded room.
Choose Substrate Preparation and Inoculation Equipment
Substrate equipment should match the mushroom species and preparation method rather than an imagined future production scale. Oyster mushrooms grown on chopped straw or hardwood fuel pellets can be an approachable first crop because the substrate may be pasteurized or hydrated using relatively modest equipment. Shiitake on supplemented sawdust and mushrooms grown from sterilized grain demand tighter process control and greater contamination discipline.
For a basic oyster setup, useful items include a large food-safe vessel, a scale, a long mixing tool, a clean draining surface, filter-patch grow bags or food-safe buckets, and a way to heat or hold water at the required process temperature. Buckets can be washed and reused, but their holes and lids must suit the fruiting method. Filter bags make colonization easy to inspect and conserve shelf space, although they create recurring material costs and can tear during handling.
Pasteurization and sterilization are not interchangeable. Pasteurization reduces competing organisms while leaving a less selective substrate suitable for prompt inoculation with vigorous spawn. Sterilization aims for a much more complete microbial reduction and is commonly used for nutrient-rich grain or supplemented sawdust. Once sterilized material cools, it is especially vulnerable during inoculation. Treating a sterilized bag casually on a dusty bench defeats the purpose of the pressure cycle.
A pressure canner must be rated and operated for the intended job; an ordinary stockpot is not a substitute for processing material that requires pressurized sterilization. Capacity is another constraint. A small unit may handle experimental batches but become an exhausting bottleneck if every cycle accommodates only a few bags. Conversely, purchasing a commercial sterilizer before proving demand ties up money, power, and floor space. Buying prepared grain spawn—or even ready-to-fruit blocks—lets a beginner test fruiting conditions before taking on culture work and sterilization.
Measure substrate and water by weight whenever the recipe permits. Guessing moisture by appearance often creates bags that are either too dry for vigorous colonization or wet enough to develop stagnant pockets. A practical check is consistency across batches: record dry substrate weight, added water, spawn rate, inoculation date, and observations. Labels should survive condensation and include the species or strain, batch identity, and expected monitoring date.
The common purchasing mistake is acquiring culture equipment before establishing a dependable fruiting room. A microscope, petri dishes, impulse sealer, and flow hood can expand what a grower does, but they do not correct stale air or poor humidity. Begin with purchased spawn from a reputable supplier, use a substrate process you can repeat safely, and add laboratory-style equipment only when contamination rates, production goals, and time savings make the investment defensible.
Build a Fruiting Space Around Humidity and Fresh Air
A fruiting chamber must hold moist air without becoming a sealed, dripping container. Developing mushrooms exchange gases continuously. If the enclosure retains humidity but receives too little fresh air, carbon dioxide accumulates and some species respond with elongated stems, undersized caps, weak clusters, or stalled development. If ventilation is excessive or blows directly across the blocks, surfaces dry and young pins may abort.
A small grow tent or washable cabinet offers more control than humidifying an entire room. Typical equipment includes wire or plastic shelving, a cool-mist humidifier positioned so standing water cannot enter its electrical parts, a circulation or exhaust fan, ducting where needed, and separate instruments for temperature and relative humidity. Use electrical connections rated for the location, keep plugs and controllers outside the wettest zone when possible, and form drip loops in cords. Household electricity and constant condensation require conservative placement rather than improvised wiring.
Humidity readings are useful, but sensor location can distort them. A probe directly in the humidifier plume may report saturated air while blocks on the opposite shelf are drying. Place the sensor near the crop without allowing droplets to sit on it, then inspect the mushrooms and block surfaces. Cracking caps and dry, leathery pins indicate inadequate moisture or too much direct airflow. Slimy surfaces, persistent puddles, sour odors, and waterlogged blocks point toward excessive wetting, poor drainage, or insufficient air exchange.
Ventilation can be controlled with a cycle timer, humidity controller, or environmental controller, but automation needs observation. A fan that runs on a fixed schedule may perform differently in a dry winter room than during humid summer weather. Exhausting outdoors may be sensible for larger crops or heavy-sporing varieties, subject to the building layout and local conditions. A filtered intake helps keep insects and debris out, though a filter also restricts airflow and must be cleaned or replaced.
Temperature management often costs more than humidity control. Select species and strains compatible with the room before buying heating or cooling hardware. Fruiting cool-weather mushrooms in a hot outbuilding may require an air conditioner, insulation, condensate management, and substantial electricity. Choosing a warm-tolerant oyster strain during summer can be more practical than forcing the room far below ambient temperature. Never assume a small heater is harmless inside a tent; concentrated heat can dry blocks, damage plastic, and create a fire risk.
Test the empty chamber for several days, then test it again with wet blocks inside. The crop changes airflow and moisture load, so an empty-tent reading is only a starting point. The broader Mushroom growing equipment for a small homestead plan should include a drain pan, washable floor, cleaning access, and a place for the humidifier reservoir to be refilled without carrying open water over electrical equipment.
Prioritize Purchases With a Small-Homestead Checklist
The best purchase order protects sanitation and environmental stability before adding production capacity. A homesteader testing four oyster blocks needs accurate monitoring and a cleanable fruiting enclosure, not a commercial mixer. Equipment should solve a measured bottleneck: inadequate fresh air, unstable temperature, inconsistent substrate moisture, slow bag sealing, or insufficient sterilizer capacity.
Use this compact checklist before placing an order:
- Confirm the crop and substrate. Identify whether the process uses ready-to-fruit blocks, purchased spawn with pasteurized substrate, or sterile culture work.
- Measure the site. Record seasonal temperature, available electrical service, water access, drainage, ventilation route, and clean shelf space.
- Buy sanitation basics. Choose washable work surfaces, cleaning supplies, gloves, durable labels, and pest-resistant storage.
- Control the fruiting environment. Add shelving, a suitable enclosure, humidification, air exchange, and independent temperature and humidity monitoring.
- Add processing capacity last. Purchase a sealer, pasteurization vessel, pressure canner, mixer, or flow hood only when the selected method requires it.
Budget comparisons should include operating costs and labor. Reusable buckets cost more effort to scrub and sanitize but avoid purchasing a new bag for each cycle. Filter-patch bags improve visibility and handling, yet require reliable disposal and often an impulse sealer for some workflows. A manual spray bottle is inexpensive for a few blocks, but it produces uneven conditions and demands frequent attention. An automated humidifier saves labor, although its reservoir and tubing can become contamination sources if they are not cleaned.
Used shelving, stainless tables, and food-grade vessels can stretch the budget when they are intact and thoroughly cleanable. Avoid secondhand humidifiers with inaccessible mineral buildup, rusty racks that shed coating, damaged pressure vessels, and porous containers that previously held unknown chemicals. Pressure equipment should have readable manufacturer information, working safety components, and compatible replacement parts. Cheap equipment becomes costly when it introduces uncertainty into a safety-critical process.
Signs the setup is working include even colonization, predictable pin formation, firm mushrooms with species-appropriate shape, manageable condensation, and repeatable results between batches. Green, black, or unusually colored growth, sour smells, overheating bags, persistent insect activity, and widespread malformed fruits call for isolation and diagnosis rather than more automation. Do not open visibly contaminated bags in the clean work area; seal and remove them according to the substrate and local disposal options.
Keep a simple batch log before expanding. If three small runs succeed under the same procedure, increase production gradually and watch whether humidity, cooling, and fresh-air equipment can handle the added biological load. Reviewing a focused Mushroom growing equipment for a small homestead list against actual records prevents speculative purchases and reveals which upgrade will reduce labor or losses.
Frequently Asked Questions
What equipment does a beginner need to grow oyster mushrooms?
A beginner can use purchased spawn or fruiting blocks, washable shelving, a small fruiting enclosure, humidifier, fan, thermometer, humidity meter, gloves, labels, and cleaning supplies. Substrate work also requires a food-safe mixing or pasteurization vessel and appropriate bags or buckets.
Is a pressure canner necessary for homestead mushroom growing?
Not for every method. Pasteurized straw or hydrated pellet methods may avoid pressure sterilization, while grain spawn and nutrient-rich supplemented substrates generally require more rigorous processing. Buying prepared spawn allows beginners to postpone that investment.
Can mushrooms be grown in a greenhouse?
A greenhouse may work seasonally if shade, humidity, temperature, and fresh air remain suitable for the species. Heat and rapid daytime temperature swings often make it harder to control than an insulated room or enclosed tent.
Should a humidifier run continuously in a fruiting tent?
Usually not. Continuous operation can soak blocks and create puddles. Control output with measured humidity, crop appearance, and ventilation cycles, and keep the sensor away from the direct mist plume.
When is a laminar-flow hood worth buying?
A flow hood becomes useful when regular agar work, culture expansion, or sterile bag inoculation makes a still-air box too slow or inconsistent. It offers little value if poor fruiting conditions remain the main source of losses.
Conclusion
Build the operation around a specific mushroom, substrate, and available room rather than purchasing a generic equipment package. Separate clean inoculation from humid fruiting, measure the environment before automating it, and choose species that fit the homestead’s seasonal temperatures. Prepared spawn and pasteurized oyster substrate offer a lower-complexity way to validate the workflow before investing in pressure equipment or culture tools.
Next, sketch the three work zones, record room conditions, and price the sanitation and fruiting items needed for one small batch. Run the chamber empty, add a limited number of blocks, and keep notes on moisture, airflow, temperature, contamination, and mushroom shape. Expand only after repeated batches show which piece of equipment is genuinely limiting production.