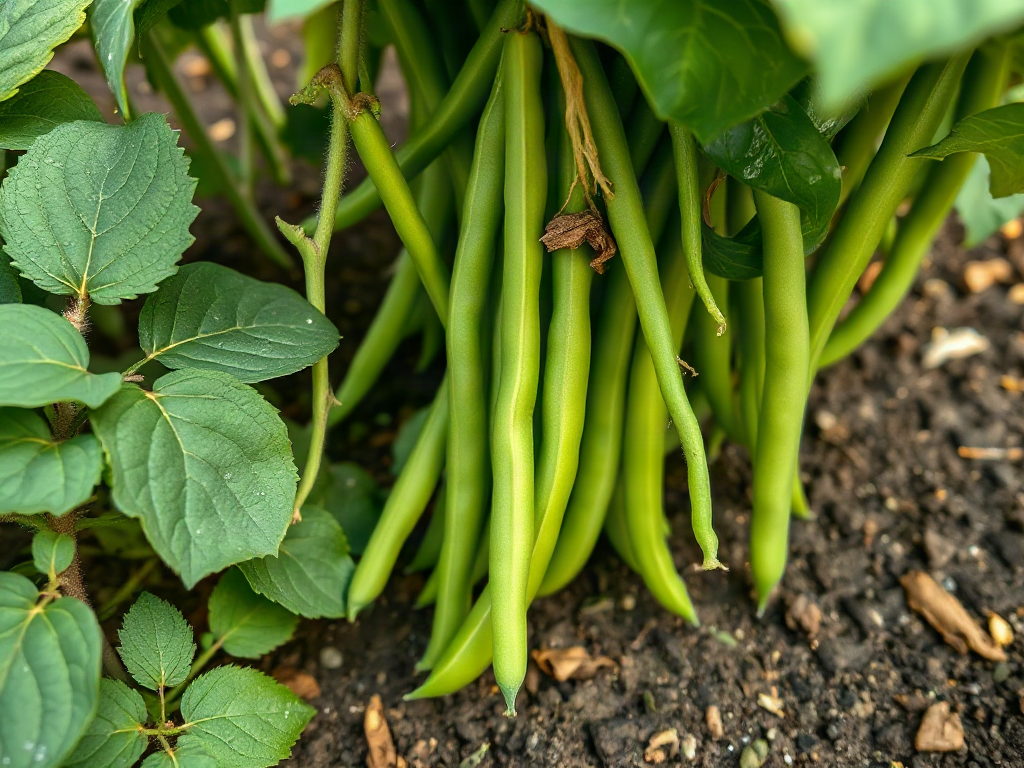
Backyard beans produce dependable beginner harvests when gardeners choose a variety suited to their space, sow after the ground has warmed, provide steady moisture, and pick pods before seeds become swollen. Bush beans offer a compact, concentrated crop, while pole beans need sturdy support but usually yield over a longer period. Plant seeds directly in loose, well-drained ground because bean roots resent transplanting and waterlogged conditions. Avoid excessive nitrogen fertilizer, which favors leaves over pods. Check plants every few days once production begins, since frequent picking encourages continued flowering and keeps snap beans tender.
Choose Bush or Pole Beans for the Available Space
The first useful decision is not the color of the pod but the growth habit of the plant. Bush beans form compact plants that generally need no trellis and produce much of their crop within a relatively short window. They suit raised beds, short rows, and containers that are wide enough to keep several plants from drying out quickly. Pole beans climb, require support from the beginning, and tend to spread production across a longer picking period.
A beginner who wants enough beans for several meals at once may prefer two or three short sowings of bush beans. Staggering those sowings by roughly two weeks reduces the chance that every plant will mature simultaneously. Someone with limited ground area but room for a six- to eight-foot trellis can obtain more picking surface from pole beans. Their vertical growth also makes pods easier to see, although setting up a secure structure adds work before planting.
Snap beans are harvested while the pod is young and tender. Dry beans remain on the plant until the pods and seeds mature, so they occupy the bed longer and face more exposure to wet weather near harvest. For a first crop, snap beans provide quicker feedback and fewer drying decisions. Green, yellow wax, and purple-podded cultivars can all be snap beans; pod color alone does not determine growth habit or maturity.
Read the seed packet for bush or pole habit, expected days to maturity, mature height, and any noted disease resistance. Days to maturity are an estimate from suitable growing conditions, not a guaranteed calendar date. Cold ground, shade, drought, or heavy soil can delay flowering. A locally adapted cultivar sold by a regional seed supplier may be a safer choice than an unusual long-season bean when summers are short.
The common mistake is buying pole seed for a low border or planting bush beans beneath a tall trellis and expecting them to climb. Match the architecture of the plant to the site before comparing finer traits. For a simple first attempt, the priorities are clear:
- Choose the growth habit: bush for compact simplicity or pole for vertical, extended production.
- Choose the harvest stage: snap beans for fresh pods or dry beans for mature seed.
- Check the season: select a maturity range that fits the frost-free period.
This variety decision anchors a workable plan for Backyard beans for dependable beginner harvests rather than leaving success to an attractive seed-packet photograph.
Prepare the Bed and Plant at the Right Time
Beans germinate most reliably in warm, aerated ground after frost danger has passed. Sowing into cold, saturated earth can cause the seed to rot before a shoot emerges. Waiting for consistently mild conditions is usually more productive than gaining a few uncertain days by planting early. If local timing is unclear, use the regional last-frost window and soil conditions together rather than relying on the calendar alone.
Select a location receiving at least six hours of direct sun, with more light preferable where summers are not excessively hot. Beans tolerate several soil types, but standing water deprives roots of oxygen and encourages decay. Loosen compacted ground, remove perennial weed roots, and incorporate finished compost if the bed is low in organic matter. Compost should improve structure without turning the planting row into an overly rich fertilizer band.
Direct sowing avoids root disturbance. Place seed at the depth and spacing listed for the cultivar because seed size and growth habit vary. As a practical rule, beans are often planted about an inch deep, but heavy ground calls for shallower placement than fast-draining sandy ground. Bush rows need enough air space for leaves to dry; pole beans should be placed along a trellis that is already installed. Driving posts beside established roots can damage plants later.
Water the row after sowing so the seed coat receives even moisture, then avoid repeatedly flooding it. A crusted surface can obstruct emerging seedlings, especially in clay. A light layer of fine compost over the row may limit crusting, but thick mulch should wait until seedlings are visible and the ground is warm. Mark the row because beans can take longer to emerge during a cool spell, and accidental hoeing is a common loss.
Containers are workable when they have drainage holes and enough volume to buffer moisture changes. A narrow pot can become dry by afternoon even when a bed remains moist. Bush types need a broad container for stable spacing; pole types need both adequate root room and an anchored support that will not topple when covered with foliage. Container mix should drain freely rather than being filled with dense yard soil.
If fewer seedlings emerge than expected, inspect rather than immediately reseeding the entire row. A soft, decayed seed points to cold or wet conditions. A hollow spot may indicate feeding by birds or other animals. A firm seed in dry ground needs moisture. Correcting the cause before the second sowing prevents the same failure from repeating.
Manage Water, Feeding, Weeds, and Support
Steady root-zone moisture matters most during flowering and pod development. Beans stressed by dry ground may shed blossoms or form short, misshapen pods, while continually soaked roots can yellow and decline. Check moisture below the surface with a finger or small trowel instead of judging by a dusty crust. Water deeply enough to moisten the active root area, then allow air to return to the soil.
Morning irrigation gives foliage time to dry and makes moisture available before afternoon heat. Directing water at the base is preferable to frequently wetting the leaves, particularly where foliar diseases are common. A two- to three-inch layer of clean organic mulch can moderate evaporation after the ground has warmed. Keep mulch slightly away from stems so it does not hold constant dampness against young tissue.
Beans are legumes, but that does not mean they prosper in neglected ground or need heavy fertilizer. Their association with nitrogen-fixing bacteria can meet part of their nitrogen demand under suitable conditions. Excess soluble nitrogen often produces lush vines and fewer flowers, especially when the bed recently received manure or was heavily fed for leafy vegetables. A soil test is more informative than applying a high-nitrogen product by habit.
In a new bed where beans have not grown before, a bean-specific inoculant may be considered if the product is appropriate for the species and used according to its label. It is not a substitute for drainage, suitable pH, or sound planting time. Gardeners should also avoid treating inoculant as a guaranteed yield booster; compatible bacteria may already be present, and storage conditions affect living products.
Weed early and shallowly. Bean roots occupy the upper soil, so deep hoeing close to plants can sever them. Pull small weeds while the soil is slightly moist, then mulch to suppress later germination. Stop cultivating when vines cover the row and hand-remove competitors that break through.
Pole supports must withstand wind and the weight of wet vines. Tie the top of a trellis securely and check anchors before plants reach it. Guide wandering shoots toward the support without tightly binding the stems. A plant that repeatedly falls onto nearby vegetables loses light and creates a tangled picking area. These routine checks make Backyard beans for dependable beginner harvests manageable without constant intervention.
Recognize Trouble Before It Reduces the Crop
Bean problems are easier to interpret when the pattern is considered alongside recent weather and care. Uniform yellowing across a whole row suggests a root-zone or fertility issue more readily than a pest attacking a few scattered leaves. Holes, skeletonized tissue, sticky residue, spots, and distorted new growth point toward different causes. Examine leaf tops, undersides, stems, flowers, and the surrounding ground before choosing a response.
A few chewed leaves seldom justify aggressive treatment on vigorous plants. Hand-picking visible beetles, removing badly infested foliage, or protecting young rows with suitable physical barriers may be enough. Any cover used during flowering must allow pollinator access where the cultivar benefits from it, and it should not trap damaging heat. Identify an insect before applying a pesticide, including products labeled organic, because non-target insects can also be harmed.
Leaf spots and blights tend to spread more readily when foliage remains wet and plants have poor airflow. Avoid working among wet vines, which can transfer pathogens from leaf to leaf. Remove severely affected material without composting it if the home compost does not reach conditions capable of handling diseased debris. At season’s end, clear infected residue and rotate beans away from the same bed when space permits.
Flower drop does not automatically mean pollination failed. High heat, abrupt cold, drought, excess nitrogen, or waterlogged roots can interrupt pod set. Check recent conditions before adding fertilizer. If plants are dark green and vigorous but carry few blossoms, additional nitrogen is unlikely to solve the problem. If the ground is bone dry several inches down, correcting irrigation is the more relevant response.
Twisted growth, unusual mottling, or persistent stunting deserves caution. Some symptoms may come from virus, herbicide drift, feeding injury, or environmental stress, and appearance alone does not always separate them. Do not save seed from unhealthy plants with unexplained symptoms. A local cooperative extension office can help identify regional diseases or insects from clear photographs and growing details.
Keep a short record of the cultivar, sowing date, weather setback, and observed symptom. That evidence is more useful next season than the assumption that beans simply failed. Signs of recovery include clean new leaves, renewed flowering, and straight pods. Continued decline, spreading lesions, or collapsing stems indicates that removing affected plants may protect the remaining row.
Pick Beans at Their Best and Keep Plants Producing
Harvest timing determines both eating quality and continued production. Snap beans are generally ready when pods are full length, crisp, and smooth, before the developing seeds create pronounced bulges. A pod that snaps cleanly is usually at a useful stage, although some stringless cultivars remain flexible. Check the cultivar description because ideal diameter and length differ among filet, standard snap, and flat-podded beans.
Pick every two or three days during peak production. Pods can move from tender to fibrous quickly in warm weather, and mature pods signal the plant to direct energy toward seed. Hold the stem with one hand and remove the pod with the other rather than pulling on the vine. Pole plants are especially easy to dislodge from their support when pods are tugged downward.
Morning is a convenient harvest time after dew has dried but before the day becomes hot. Wet foliage is more vulnerable to spreading disease during handling, while hot harvested pods lose quality faster. Place beans in shade promptly and cool them if they will not be cooked soon. Wash shortly before use rather than storing them dripping wet, which can encourage decay.
Bush beans often give one strong flush followed by smaller pickings. Succession sowing extends the household harvest more predictably than expecting aging bush plants to produce indefinitely. Pole beans commonly continue until heat, disease, or frost ends the season, provided mature pods are not repeatedly missed. Search beneath leaves and along the inner face of the trellis; hidden oversized beans are common.
For dry beans, the method changes. Allow pods to become papery and seeds to harden on the plant when dry weather permits. If prolonged rain threatens, plants or mature pods may need to finish drying under cover with good airflow. Shell only when the seed is thoroughly dry, then inspect it before storage. Dry beans must still be properly cooked before eating; raw or undercooked beans are not appropriate for consumption.
Use harvest notes to refine the next planting. Record whether the family wanted a larger single picking for preservation or a smaller stream for meals. That distinction determines whether the next season should emphasize synchronized bush plantings, staggered rows, or climbing vines. It turns Backyard beans for dependable beginner harvests into a repeatable household crop rather than a one-season experiment.
Frequently Asked Questions
Are bush beans or pole beans easier for a beginner?
Bush beans are simpler when no trellis is available and a compact harvest is preferred. Pole beans require secure support but save ground area and usually provide pods across a longer period.
Why did planted bean seeds fail to sprout?
Cold, saturated ground commonly causes decay, while dry soil, deep planting, crusting, or animal feeding can also prevent emergence. Dig up one missing seed carefully and inspect its condition before reseeding.
How often should backyard beans be watered?
Water according to soil moisture rather than a fixed daily schedule. Irrigate when the root zone begins to dry, applying enough water to moisten it deeply without leaving the bed saturated.
Why are bean plants leafy but producing few pods?
Excess nitrogen, high temperatures, drought, cold spells, or waterlogged roots can reduce flowering and pod set. Dark, lush foliage after heavy feeding is a reason to stop adding nitrogen.
When should snap beans be harvested?
Pick snap beans when pods are crisp and full-sized but before the seeds create large bulges. Checking plants every two or three days keeps pods tender and discourages the plant from shifting fully into seed production.
Conclusion
A reliable first bean crop comes from matching the plant’s growth habit to the available bed, waiting for warm planting conditions, and avoiding extremes of drought, saturation, and nitrogen. Bush beans are useful for compact, concentrated yields; pole beans earn their trellis space with a longer picking window. Install supports before sowing, inspect moisture below the surface, and diagnose patterns before treating damaged leaves or poor pod set. Once pods appear, harvest frequently and note how the timing fits household use. The next practical step is to select one locally suitable snap-bean cultivar, prepare a sunny, well-drained row or container, and schedule a second bush sowing or a pole planting if a longer supply is the goal.